

If you've been designing in Figma and want to turn that design into a live website, Framer is the most natural next step. The two tools share the same design language: frames, layers, auto layout, components. Moving from one to the other is less of a migration and more of a handoff to yourself.
This guide walks you through the whole process, from preparing your Figma file to publishing a live Framer site, including the common issues you'll hit along the way and how to fix them.
Why Figma to Framer makes sense
Figma is excellent for designing. Framer is excellent for publishing. Together they cover the full journey from idea to live website without involving a developer or a separate build process.
The Figma to Framer workflow has become one of the most popular setups for designers who want to ship fast without compromising on design quality. You keep the creative control you have in Figma and gain the ability to add real animations, interactions, and CMS-powered content in Framer before publishing directly to a custom domain.
Step 1: Prepare your Figma file before importing
The quality of your Figma to Framer import depends almost entirely on how well your Figma file is organised. A messy file produces a messy import. A clean file produces something close to production-ready.
Before you import anything, do this in Figma:
Use Auto Layout wherever possible. Auto Layout in Figma maps directly to Framer's stacks, which are what make layouts responsive. Frames without Auto Layout come in as fixed-size elements that you'll need to adjust manually.
Name your layers clearly. Layer names carry over into Framer. "Hero Section" is easier to work with than "Frame 247." Spend five minutes renaming the important ones.
Use components for repeated elements. Buttons, cards, navigation — if something appears more than once, make it a component in Figma. It imports more cleanly and you can convert it to a Framer component afterwards.
Be consistent with fonts and colors. Use the same font styles throughout and keep colours consistent. This makes the import more predictable and saves time fixing things afterwards.
Work section by section, not full pages. Don't try to import an entire page at once. Import one section at a time, starting with the navigation, then the hero, then working down. This gives you more control and makes it much easier to fix issues as you go.
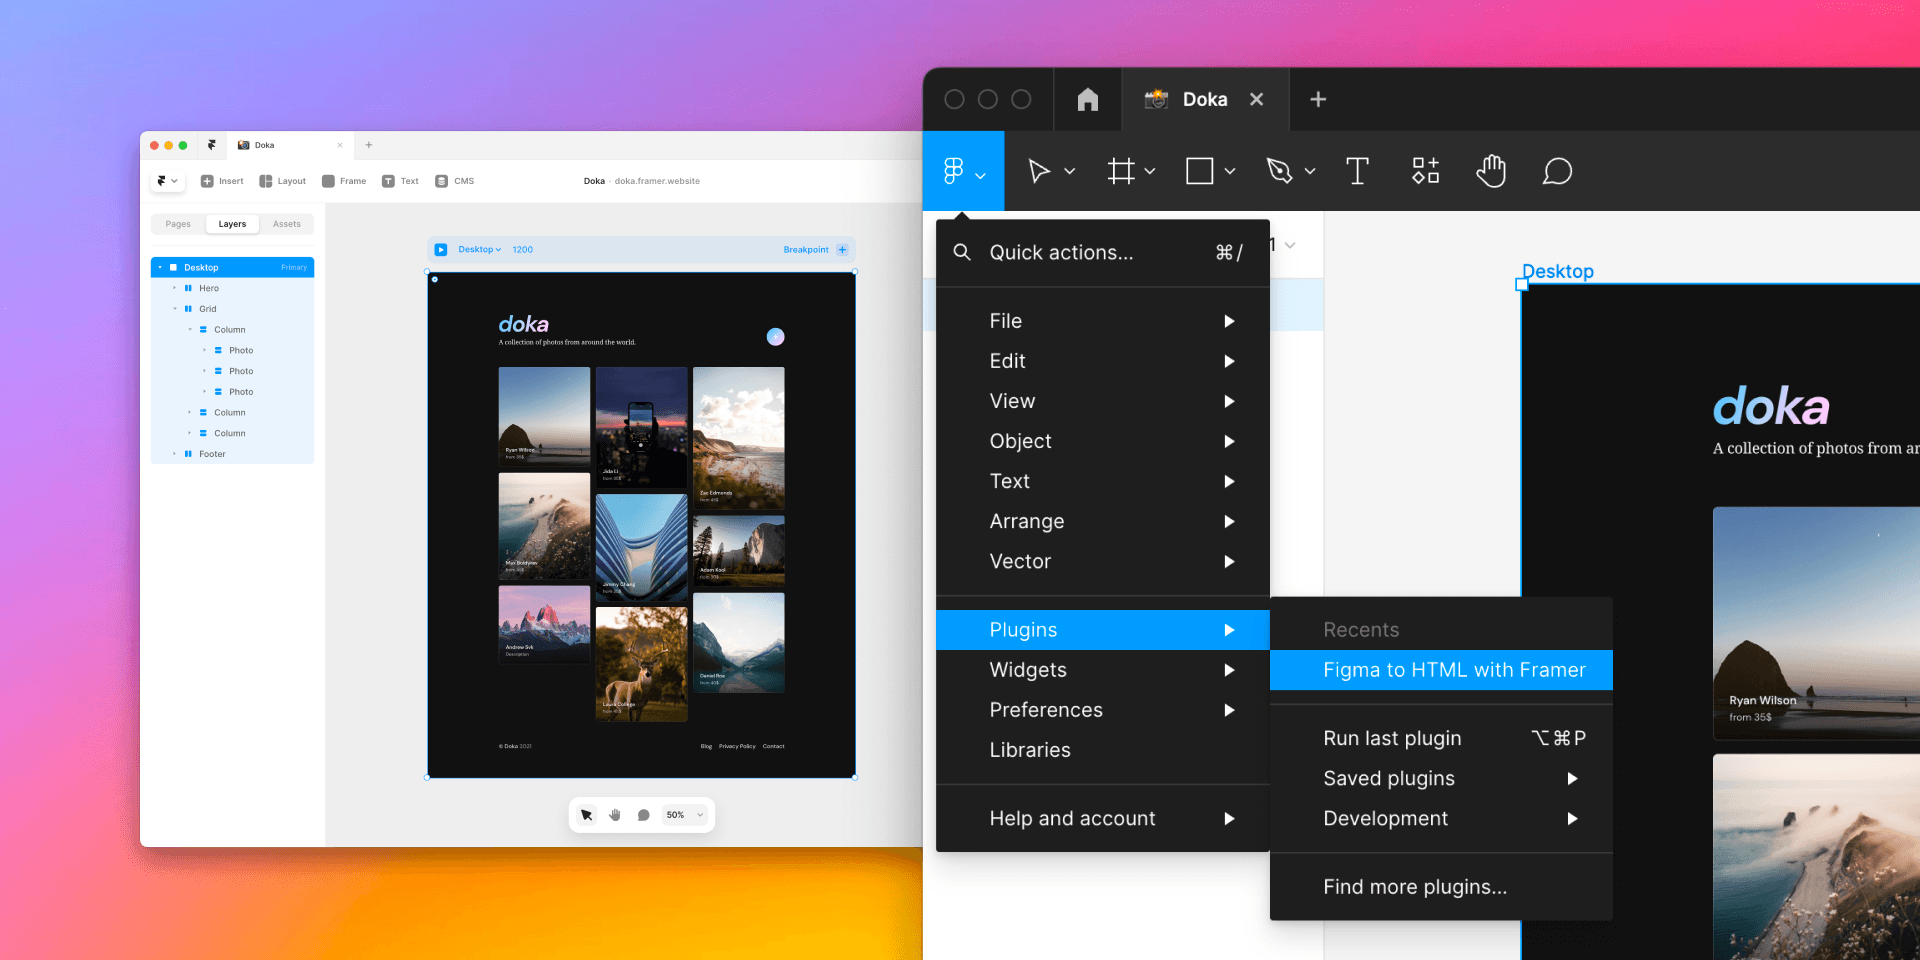
Step 2: Install the Figma to Framer plugin
Framer has an official plugin for Figma called Figma to HTML with Framer. It's free and available in the Figma Community.
Install it from the Figma Community tab. Once it's installed, you use it by selecting frames in Figma and copying them. The plugin converts the layers in the background. Then you switch to Framer and paste.
That's it. The actual import process is copy and paste.
Step 3: Paste into Framer
Open your Framer project. If you're starting fresh, create a new project and open a blank web page.
In Figma, select the section you want to import and copy it (Cmd/Ctrl + C). Switch to Framer and paste (Cmd/Ctrl + V). Framer converts the Figma layers into Framer elements, preserving text content, colors, images, and Auto Layout settings.
You'll see your design appear on the canvas looking very close to the original. It won't be perfect, but it's a strong starting point.
Repeat this for each section of your design, building up the page piece by piece rather than trying to paste everything at once.
Step 4: Fix the common issues
This is the part most guides skip over. The import works well, but there are always things to clean up. Here's what to expect:
Fonts not showing up. This happens when you're using a font in Figma that isn't available in Framer. After importing, check your text elements and swap any missing fonts for a Google Fonts equivalent or upload a custom font in Framer's settings.
Fixed widths everywhere. Elements imported without Auto Layout come in with fixed pixel widths. Change these to fill or relative widths so the layout adapts to different screen sizes. Select the element and look for the width setting in the right panel.
Images imported as embedded assets. Imported images are embedded directly. You can leave them or replace them with optimised versions uploaded through Framer's asset panel for better performance.
Spacing that looks slightly off. Padding and spacing values sometimes shift slightly in the import. Go through each section and adjust as needed using the spacing controls in the right panel.
Step 5: Make it responsive
Figma designs are built for a single screen size. Framer builds real websites that need to work on desktop, tablet, and mobile. This is where you put in the most effort after a Figma to Framer import.
Framer uses breakpoints at the top of the canvas. The defaults are desktop (1200px), tablet (810px), and mobile (390px). Click through each breakpoint and adjust the layout at each size.
Common things to fix at smaller breakpoints:
Stack horizontal layouts vertically on mobile
Reduce font sizes for smaller screens
Adjust padding and spacing to fit narrower viewports
Hide elements that don't work well on mobile
The good news is that if your Figma file used Auto Layout properly, a lot of this adapts automatically. The cleanup is mostly fine-tuning.
Step 6: Add animations and interactions
This is where Framer goes well beyond what Figma prototypes can do. Once your layout is clean and responsive, you can bring it to life with real animations that work on the live site.
Select any element and open the Effects section in the right panel. A few things worth adding:
Fade-in animations as sections scroll into view
Hover effects on buttons and cards
Smooth page transitions between pages
Keep animations subtle. Fast, clean interactions look professional. Heavy animations slow your site down and distract from the content.
Step 7: Connect your domain and publish
Once your design is in Framer, responsive, and animated, you're ready to publish. Go to Site Settings and connect your custom domain. Update page titles and meta descriptions in the SEO settings for each page. Then hit publish.
Your Figma design is now a live website.
When to import from Figma vs building directly in Framer
Importing from Figma makes sense when you already have a finished design you want to bring to life quickly, when a client has approved a Figma prototype and you need to build it out, or when you're more comfortable designing in Figma than on the Framer canvas.
Building directly in Framer makes sense when you're starting from scratch and want to design and build at the same time. Framer's canvas works similarly to Figma, and the workflow of designing and publishing in one place is fast once you're used to it.
There's also a third option worth considering: starting with a Framer template. If your goal is to ship quickly and the design doesn't need to be fully custom, a solid template gets you most of the way there in a fraction of the time. You can customise the colors, fonts, and content to match your brand without starting from zero. Browse the Holygrid Framer templates if you want a well-built starting point that's designed to be modified.
Tips for a cleaner Figma to Framer workflow
A few things worth knowing before you start:
Import small sections, not full pages. One section at a time gives you control.
Name your layers in Figma before you import. It saves time in Framer.
Use Auto Layout in Figma as much as possible. It makes responsive adjustments much faster.
Don't expect a pixel-perfect import. The import gets you close. The cleanup gets you there.
Test on mobile early. Check breakpoints before you get too deep into desktop refinements.
The Figma to Framer workflow is one of the most efficient ways to go from a design to a live website. With a clean Figma file and a bit of patience on the cleanup, you can have a published site in an afternoon. If you want to go even faster, the Holygrid Refined template is a good example of a production-ready Framer starting point that skips the import process entirely.


