

One of the best things about Framer templates is how much time they save you. A solid foundation is already there: the layout, the components, the responsive behavior. All you need to do is make it yours.
Customizing a Framer template is genuinely straightforward once you know where to start. Whether you want to swap colors and fonts, update the CMS with your own content, or adjust spacing to fit your brand, this guide walks you through the whole process step by step.
Why customizing a Framer template is easier than you think
Framer is built for designers. That means most of what you want to change, you can change visually without touching code. Colors, fonts, spacing, images, text. All of it is editable directly on the canvas.
The key is understanding how the template is structured before you start making changes. Good templates use global styles and components, which means you change something once and it updates everywhere. Bad templates don't, which means you're hunting through every page manually. The Holygrid Framer templates are built with global styles throughout, so making changes is easy.
Step 1: Start with global styles
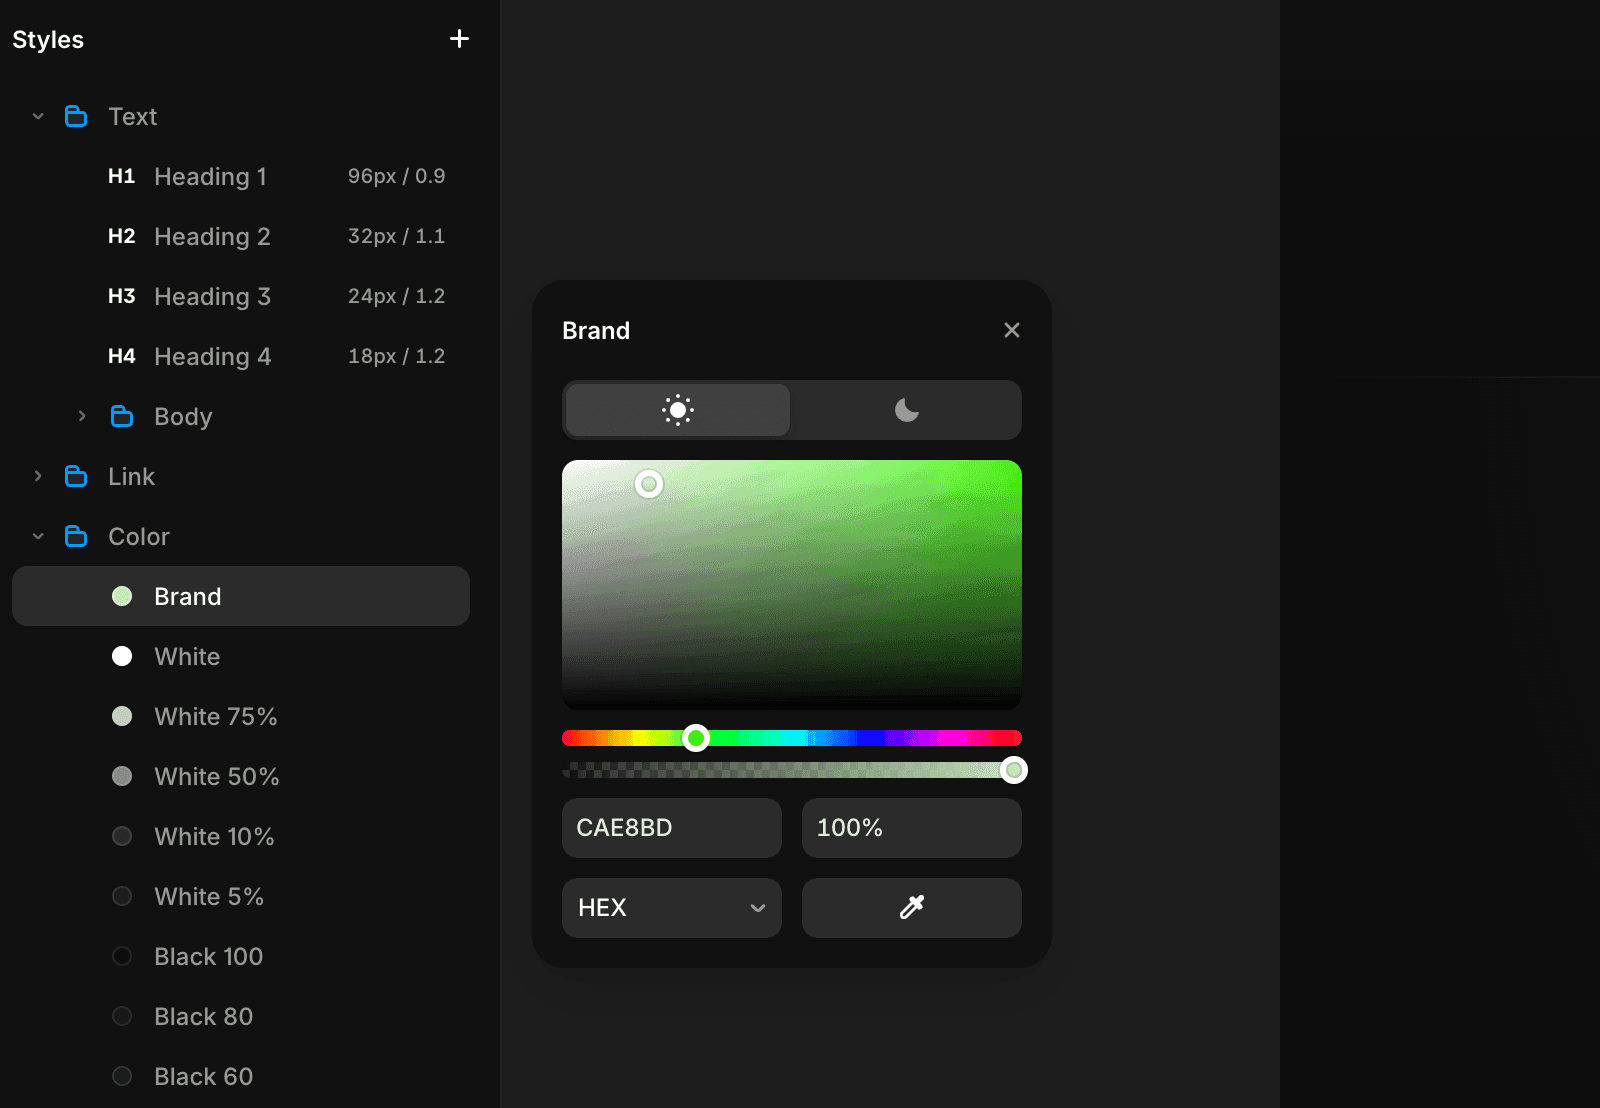
Before you touch a single frame, find the color and text styles. In Framer, these live in the Assets panel on the left side. Look for the Styles section.
Every well-built template defines its colors and fonts here. If you change a color in the style panel, it updates across the entire site instantly. This is where you should spend the first ten minutes of any customization project. The Framer Academy has a good walkthrough of how styles work if you want to go deeper.
What to update first:
Primary and secondary brand colors
Background and surface colors
Font choices and sizes for headings and body text
If the template doesn't use global styles and every color is set individually on every frame, that's a sign the file wasn't built cleanly. You'll spend more time fixing than designing.
Step 2: Customize Framer template components
Components are reusable building blocks. A navigation bar, a card, a button, a footer, these are usually components in a well-built template. When you edit the main component, every instance on every page updates automatically.
To edit a component, double-click into it on the canvas. Make your changes there. When you exit the component, all instances reflect the update.
Common components to customize:
Navigation: update logo, links, and button labels
Hero section: swap headline, subtext, and CTA button
Cards: update content and adjust layout if needed
Footer: add your own links, social handles, and contact info
Don't edit individual instances unless you specifically want that one to look different. Always go to the main component first.
Step 3: Replace placeholder content
Once your styles and components are set, work through the pages and replace all placeholder text and images with your own content.
A few things to watch out for when you customize a Framer template:
Images: Framer hosts images on their CDN. You can drag and drop new images directly onto the canvas or into the assets panel. Replace placeholder images early so you can see how your content actually fits the layout.
Text: Double-click any text element to edit it inline. Watch for text that overflows its container when you change the length. Some templates assume short headlines.
Links: Update all navigation links, CTA buttons, and footer links to point to the right pages on your site.
Step 4: Update the CMS
If the template includes a blog, portfolio, or any other CMS-powered section, this is where you add your real content.
Go to the CMS panel on the left side. You'll see the collections the template uses, typically something like Blog Posts, Projects, or Team Members. Click into a collection and start replacing the placeholder entries with your own. The Framer CMS documentation is worth a quick read if this is your first time working with it.
Tips for working with the Framer CMS:
Delete placeholder entries you don't need
Match the field types when adding content (text, image, rich text, etc.)
Check how CMS pages look on mobile after adding your content, since image ratios and text lengths can affect the layout
If you're using the Refined template or the Gallereee template, both use CMS extensively for portfolio items and directory listings. The collections are clearly named and straightforward to update.
Step 5: Adjust layout and spacing
Once your real content is in, you'll almost always need to tweak some spacing. Placeholder content is usually designed to fit perfectly. Your content rarely does.
The most common adjustments when you customize a Framer template:
Padding inside sections that feels too tight or too loose with your content
Image aspect ratios that don't match your photos
Font sizes that need scaling up or down for your headlines
Sections you don't need at all. Just select and delete them
Framer's layout system uses stacks and grids that adapt to content size, so most spacing adjustments are straightforward. Select the container, adjust padding and gap values in the right panel, and you're done.
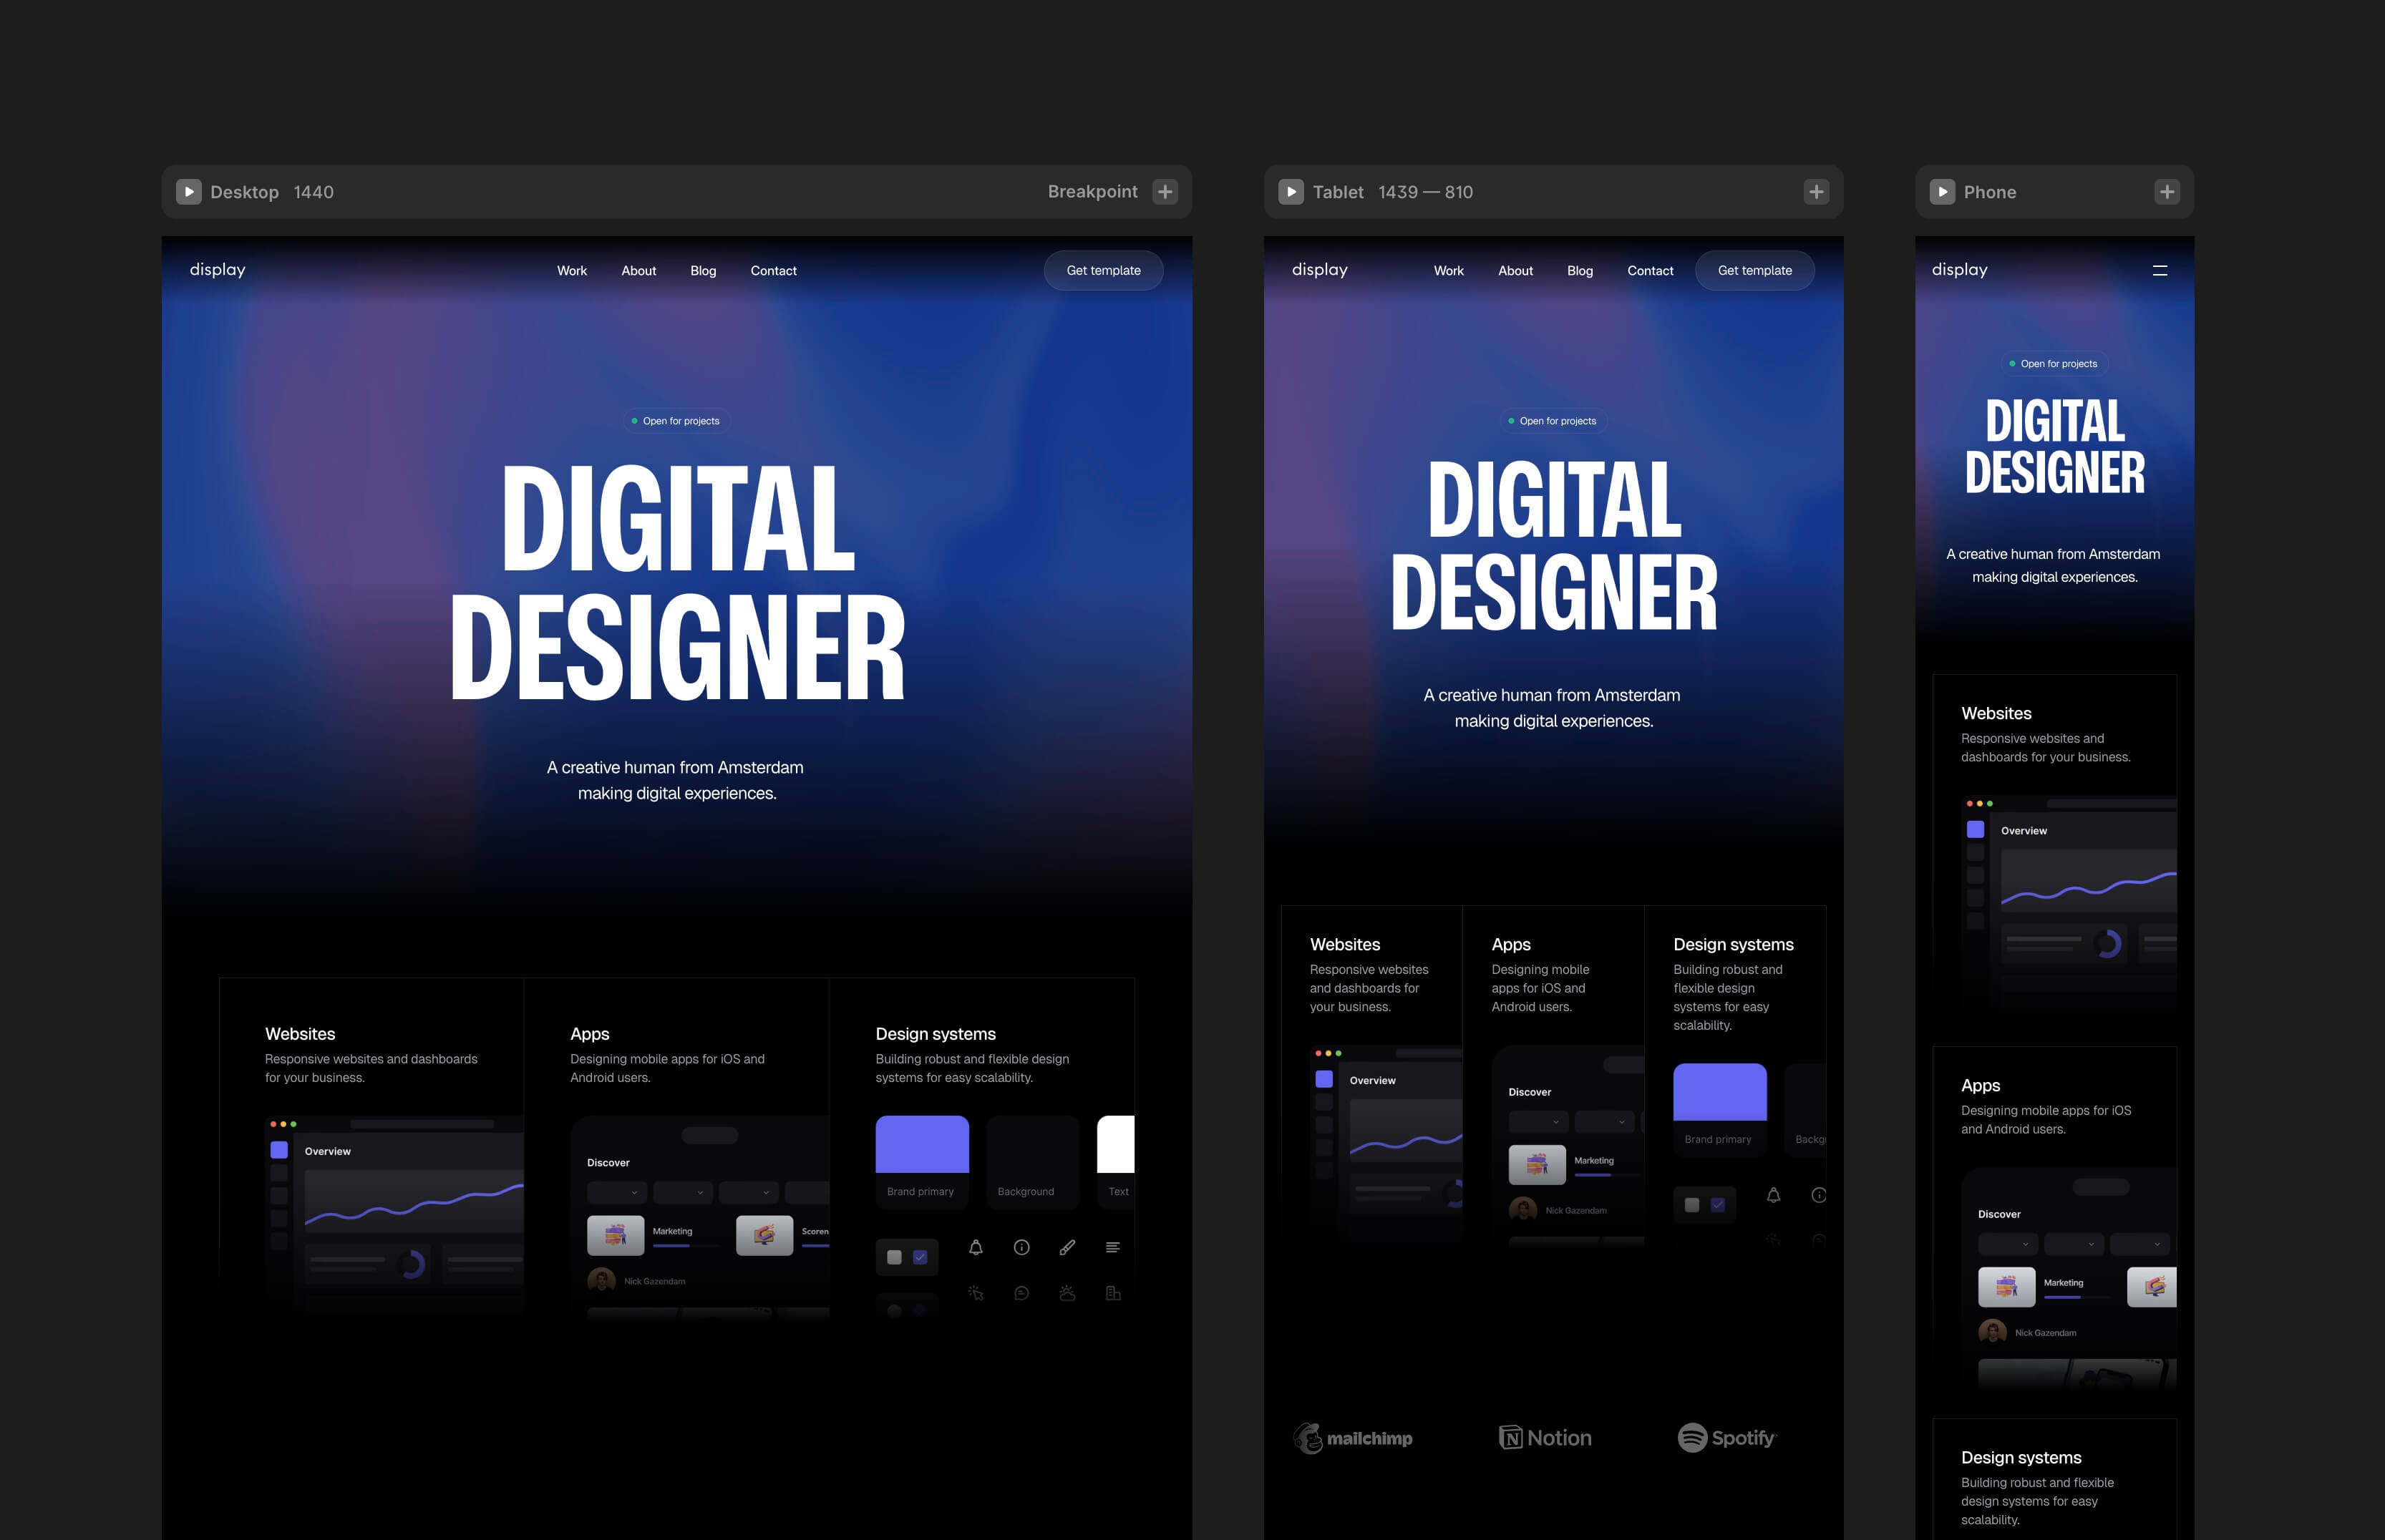
Step 6: Check your content on mobile
Framer handles responsive behavior automatically across breakpoints, so you don't need to set anything up. What you do need to check is whether your specific content looks good at smaller screen sizes.
Switch between breakpoints using the device selector at the top of the canvas. Common things to look for:
Long headlines that wrap awkwardly on small screens
Images that need different aspect ratios on mobile
Navigation that needs adjustment for smaller viewports
Fix anything that looks off before publishing.
Step 7: Connect your domain and publish
Once your customization is done, go to Site Settings and connect your custom domain. Framer will walk you through the DNS settings. It usually takes a few minutes to propagate.
Before you hit publish, run through this checklist:
All placeholder text replaced
All images swapped for your own
All links working and pointing to the right places
Mobile layout checked at all breakpoints
CMS content added and reviewed
Page titles and meta descriptions updated in SEO settings
How to customize a Framer template without breaking it
The most common mistake people make is editing directly on the canvas without understanding what they're changing. A few rules that will save you time:
Edit components, not instances. If you change a button color on one page and it doesn't update elsewhere, you edited an instance instead of the component. Undo, find the main component, and edit that instead.
Use global styles. Don't set colors directly on individual elements if the template uses style variables. Change the variable and let it cascade.
Duplicate before experimenting. If you want to try a layout change you're not sure about, duplicate the page first. Framer doesn't have unlimited undo history, and rebuilding something from scratch is annoying.
Don't delete what you don't understand. If you're not sure what a hidden layer does, leave it alone until you do. Some templates use invisible frames for layout or interaction purposes.
The 80/20 rule of template customization
Most of the visible difference in your final site comes from the first 20% of changes: brand colors, fonts, your own images, and your real content. The remaining 80% is fine-tuning.
Get the basics in fast, publish, and refine from there. A live site with real content is always more useful than a perfect site that never ships.
If you want to see what a well-structured Framer template looks like before you start, browse the Holygrid Framer templates for examples built with clean components and global styles throughout.


